Sellin Beach

0
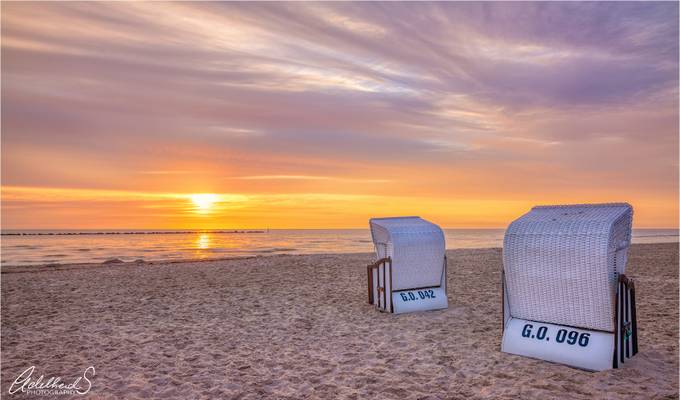
I photographed these tyical Baltic Sea beach chairs near Sellin on Rügen. They fascinate me, they have such a classic, old fashioned look, like stepping into a movie scene from the 1930's. It is a typical German thing. there is even a slight difference in style between the Baltic chairs and the North Sea chairs. Their German name translates to 'beach basket' and apparently no day on the beach is complete without renting one of these for the day. I was lucky enough to photograph these during a wonderful sunrise.

0
... with me this piecful sunrise in Sellin on Rügen. Even if it was not spectacular it was beautiful, especially with some of the beach chairs left open so we could just sit down, lean back and listen to the calmness around us while watching the dawn.
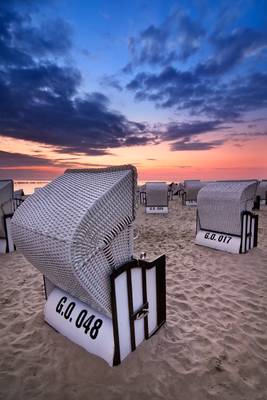
I also was hopping around through the chairs searching for comps and this is one of the few where I got quite a nice distribution of them through the frame while also leaving space for the viewer to get into the picture. The sky was also harmonizing well here. What do you think?
I did DRI here but I think the blend is not noticable. Some slight color enhancements and contrast for the finishing touches!
Photoshop Tip masking:
For a photo like this when blending multiple exposures it is very nice to have at least for some objects in the frame a clean selection. For example the main beach chair which extends into the sky. There I wanted a clean selection which let me apply masks in the sky or the foregound while leavin the other alone. What can you do? Go to your channels pallete and click through the separate channels. often you find one channel which already has a good contrast around the edges (here between sky and chair) . Duplicate this channel, call it selection or something and go to "Image->Image Processing" (I'm not sure how this is called in the english version :-( ) Select blending mode overlay or soft light and the contrast will increased even more.. now got to "Image->Adjustments->Levels" and increase it so you get white on the one part and your object bekomes black. You might need some brush work to clean things up, also use dodge and burn but in the end you should get a quite good selection channel. Ctrl+click will select the while pixels and SHIFT+CTRL+i will invert it. Then you can go to your initial mask in the layers pallete and while having one part selected cleanly work there while preserving the other part.
cheers