
Landkreis Rastatt
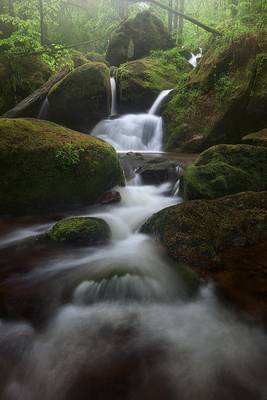
Last weekend I lead my first workshop for Light and Land in the German Black Forest. On Friday I went scouting a bit in pouring rain. The atmosphere here at the Gertelbach was very special that day.
Homepage | Facebook | Google+
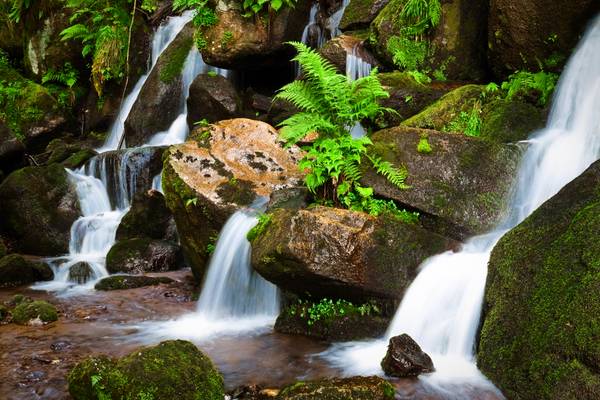
The Black Forest is where I began learning proper photography. And actually it's the many beautiful waterfalls in the...
First time I met up with another flickr photographer -> www.flickr.com/photos/andywon/ If you don't know him check out his photostream, lot of great landscape photos and many waterfalls. As I went to the black forest for the first time more than one year ago I was browsing his photostream for possible places to go;-) so it was nice to finally meet up with him.
We went to the Gertelbach cascades which offer plenty of little falls but are not so easy to photograph. Here we were quite lucky with the late afternoon light in the background. It gave a nice reflection in the pool below this little waterfall and with my daylight whitebalance the waterfall had a nice blue cast to it.
As usual I did dri here and some manual blending which I hope is not so obvious.. I tried to keep things natural while increasing the blue in the water a bit.. I just need color contrasts ;-)
cheers
next photoshop tip sharpening:
Well I'm going on without any logical sequence, just what comes to mind.. So the next tip is about the last sharpening you apply to your pictures, right after you scaled them to your desired output size! If you make a smartobject of your layers prior to scaling and sharpening it will be easy to later change the size for web e.g. and also adjust the sharpening radius. That's an important part of my workflow... using smartobjects lets you apply filters nondestructively and you always keep complete control. So here are in fact more than one ps tip.. Try the selective sharpening tool. this is quite superior to the unsharp mask since you can fade the effect in the highlights and shadows. For web try a radius around 0.3 or 0.4 and a sharpening of 120-160.. this way it looks crisp on the screen without to many white edges. For print you need something between 0.8 and 1.5 or even more depending on the size of the print.. there are tools to calculate the optimal size and always remember if it hurts your eye on the screen it might just be right for print.. you need to do some testing there.
And one final tip.. You might want to use a mask to keep the sharpening to the edges and leave planes out.. Go to your channels pallete and CTRL-click on the rgb-layer. Then create a new channel which you could name sharpen-mask and fill the selection with white -> you get a luminance channel for your image. Now use "filter->stylize->find edges" to get the edges of your image.. then use gaussian blur around 2.0 (do some tests) and later tonal adjustment to increase the contrast between the edges and the white around.. You now have an edge-mask which you can use on your sharpening in the smartobject.... and thats another nice thing about the smartobject.. filters you apply there come with a mask :-)
PS: if you have questions feel free to ask . Or if it's bullshit I'm talking here feel free to correct. I'm always eager to learn!
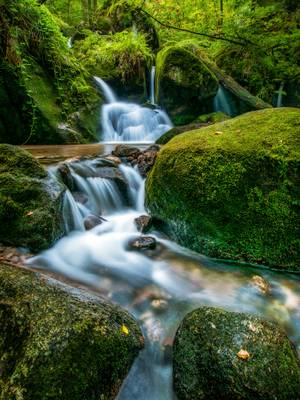
Part of my ongoing "Black Forest Waterfalls" series
The Gertelbach Falls near Bühlertal rank among the highest waterfalls in the Black Forest. The...
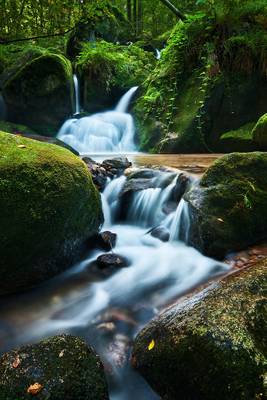
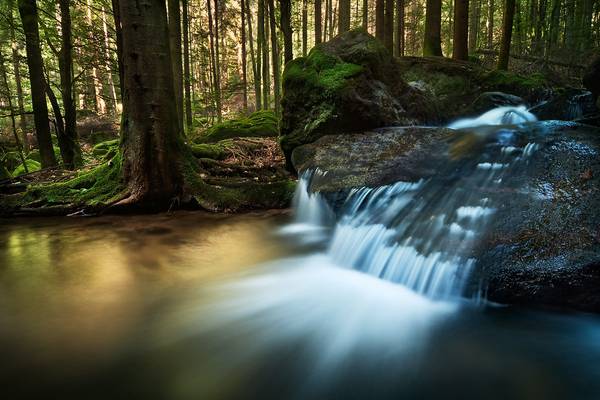
Taken during a photo trip to the Gertelbach with www.flickr.com/photos/andywon/ This was still on our way up and I couldn't resist getting my feet wet :-) I loved the snaking water and tried to capture it that way. By using the polarizer the colors became quite intense and this looks somehow like a jungle scene, but it's the german black forest. Although it was during midday and the sun was out this part of the cascade gets nearly no light and without any nd filters 10sec was needed. I liked the effect here.. For such small waterfalls short exposures just don't work for me..
Hope you like it, please check out Andy's photostream, there are many great landscapes to find and he has also already posted one shot from our trip.
todays photoshop tip is more of a link to a couple of great tutorials which I heavily employd in postprocessing this shot. You will not see much difference to my usual style here but the techniques employed are more of a leap in preserving quality during postproc. A big print will show the benefit for sure! So what about the tutorials. One of my flickr contacts ( www.flickr.com/photos/24562498@N03/ ) just recently pointed me to the homapage of Tony Kuyper -> www.goodlight.us/writing/tutorials.html . He has a bunch of tutorials describing luminance masking and saturation masking there and those are simply great. I was using a lot of mask painting in my work already and also employed the basic luminance mask but what tony describes goes farther. It will help you target specific tonal regions in your image while preserving the tonal values in other regions and he also describes how to keep or work the contrast while employing such masks. That's very important and if you are interested I suggest you read his descriptions.
cheers
Thanks to all Phoide contributors to Landkreis Rastatt!
Most notably Michael.